Your basket is currently empty!

Tools & equipment to get started with natural dyeing
We have already discussed this quite a few times in the workshops: What equipment do you really need as a beginner in natural dyeing?
In the studio workshops, everyone was always able to see and try out what was being used and for what. (Edit: I wrote this post when no in-person workshops were possible due to the lockdowns). Unfortunately, this doesn't work quite as well in the online workshops. But you still don't have to invest in a huge amount of equipment if you want to try dyeing with plants. So if you're unsure whether dyeing is for you, this article will give you a good overview.
First things first: an important recommendation is that pots used for dyeing no longer belong in the kitchen. The same applies, of course, to spoons, measuring cups and the like. Equipment for plant dyeing should no longer be used to prepare food.
Even if plants and minerals are of natural origin, they may contain toxic, or irritant substances. Over time, residues accumulate and can then become problematic. I highly recommend to use a dedicated pot for dyeing, right from the start.
When you start with natural dyeing, you probably don't want to equip a complete dye kitchen right away - and you don't have to! One dedicated pot in a suitable size for your projects is a great starting point. Add some things you may already have at home or can find second hand, and you've got yourself a low budget set up.
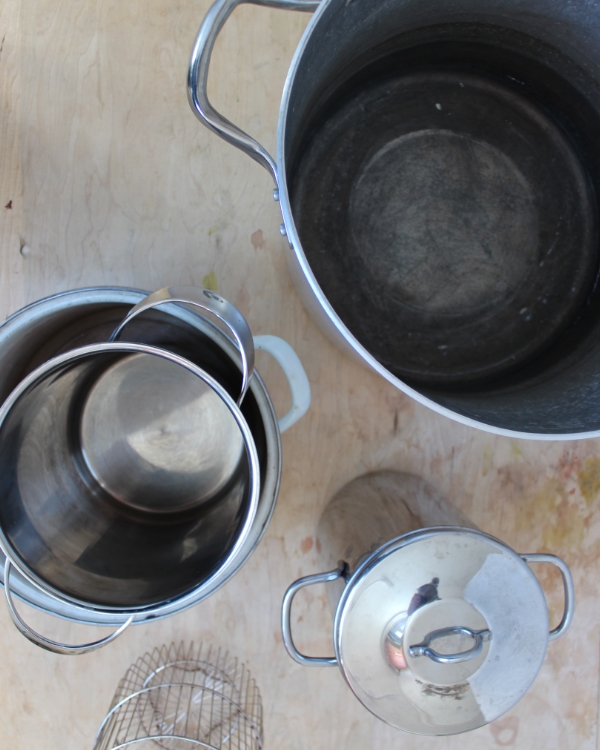
Pots for dyeing with plants
I got most of my dye pots second hand. If you're not pressed for time, it's well worth to browse some charity shops or online marketplaces for used pots.
Pots made of non-reactive material are often recommended. That could be stainless steel or enamel pots (as long as the coating is not damaged). Those materials don't react with dye baths or mordant solutions, are easy to clean, and versatile. So they'd be my first choice to set up a dye kitchen.
Other pots, made of copper or iron, can also be used for dyeing. With them the dyer can take advantage of the fact that the metal reacts, and thus also affects the dye results. Traces of iron, for example, make colors darker, and somewhat duller. As you can imagine, this can make dyeing even more adventurous, with another factor that can affect the colours.
In addition to simple pots in various sizes that I use with hotplates, I have other pots in the studio: electric canning pots (not pressure canners!). These are available in Germany in sizes up to 25-30L. If you are looking for something in that size range, I really like working with them. They usually have a built-in thermostat (which is reasonably reliable), and often also a timer.
Other vessels: buckets and jars
In addition to dye pots, simple lidded buckets, are good to have at hand. Especially if you only have one dye pot for the time being. In lidded containers you can also soak plant material, store a dye bath, or save a mordant solution until you want to use them. I also have plastic tubs and large enamel bowls in the studio, but especially for starters, I would recommend sealable containers. They're just the most versatile.
Buckets like this can be found at hardware stores for a reasonable price. You can also ask in restaurants and cafés, they often have yogurt and the like in large buckets made of sturdy plastic, which you can get for free. Bonus: buckets that have a liter scale inside. I rarely need a measuring cup that's accurate to the milliliter - when it really comes down to accuracy, I simply weigh liquids.

For smaller quantities, of course, simple jars are handy. I have more screw top and canning jars then I'd like to admit, they're just too practical! And virtually for free when reusing food containers. Dried dye plants can also be stored in them, but should not be kept in constant sunlight.
Tools to weigh, measure, stir
If you work with mineral mordants I'd recommend a scale to measure by weight. It does not have to be accurate to the decimal point. A simple kitchen scale is usually sufficient. I only use a precision scale when I make printing pastes - if you don't intend to do that, then you'll be fine with a low budget kitchen scale.
You should probably have at least one spoon for measuring in your dye kitchen.
I made sure I (and everyone else in the studio) can recognize the "non-food" spoons at a glance: For dyeing, and only for that, I have long-handled teaspoons.
Especially now that I dye more often at home again during the lockdown, instead of in the studio, I find this spoon situation very convenient! No matter what kind of spoon(s) you choose, I find it really handy to have it stand out in shape or colour, especially if you dye in your kitchen.
To carefully stir the dye baths I now actually prefer to use smoothly carved branches from the garden. So a super low-budget solution. You can find stirring paddles (at artist supplies or hardware stores), or long-handled wooden spoons. Both are often inexpensive, but usually a bit rough. They are not great for delicate fabrics, but can probably be sanded for a smoother surface.

Tools to strain and filter

There are nice and sturdy stainless steel strainers, but the simplest and cheapest option are cloths like cheesecloth or muslin. They're also great because you can really squeeze out all dye liquid from the plant matter when straining with them.
And they're very handy to wipe up all the splashes, too.
If I use sieves, it's mostly those that actually came with some of my second hand finds like pasta and asparagus pots.
Health and safety
For mordanting and dyeing you should get thick rubber gloves. If you are working with finely ground powders, or large quantities of dried plants (which also crumble/dust when weighed), wear a well-fitting (dust) mask.
Depending on where you are working, you can also use thick foil or newspaper to cover your work surface. If you are dyeing in the kitchen, you should put away edibles and clean the surface well after dyeing.
Bonus tool
Perhaps my favourite tool: A thermometer for mordanting and dyeing - very practical, but certainly not something that is indispensable at the beginning. I love it and it makes some things easier, like monitoring a mordant or madder dye bath that should not exceed a certain temperature.
But I don't think it's essential when beginning. If you're willing to watch your dye pot a bit closer and heat it gently (a good idea anyways) you can absolutely do without.
But it also works without, if you keep a good eye on the dye pot, and rather carefully heated.
Do you have any other ideas for a quick and inexpensive dye kitchen set up? Or a "bonus tool" that is dear to you, and you wouldn't want to miss when dyeing?


Leave a Reply